AnimateDiff Introduction
GitHub address:
https://github.com/guoyww/AnimateDiff
It can be used with Stable Diffusion web UI to generate animations.
For example, a 2-second, 16-frame animation (8 frames per second).
The image below shows the result, but the actual generated animation is not as good as the ones online.
I don’t know if it’s a problem with my prompts or the model itself.

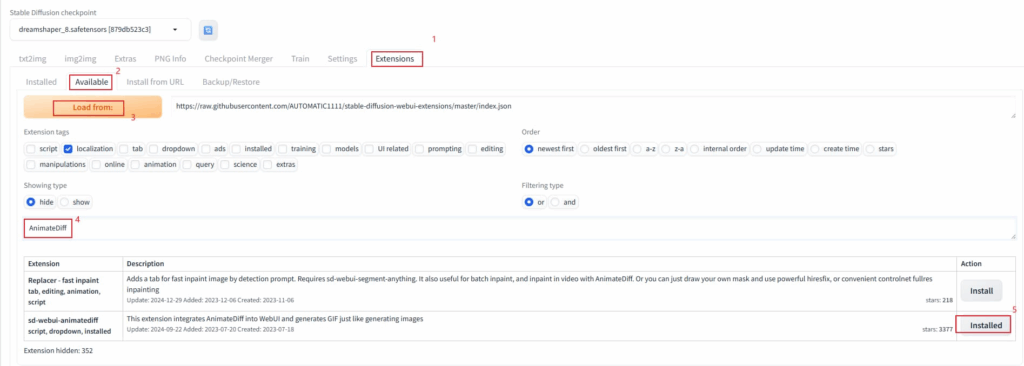
Install AnimateDiff
Open Stable Diffusion
Step 1: Click Extensions
Step 2: Click Available
Step 3: Click Load from (to get a list of all extensions)
Step 4: Enter keywords to search, such as AnimateDiff
Step 5: Select the corresponding extension and click Install
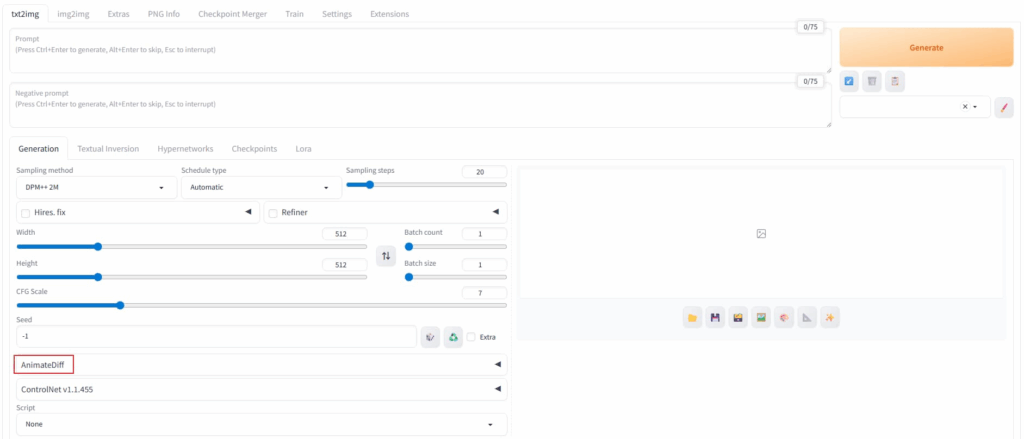
Click Installed
Click Apply and restart UI

After restarting, you can see the AnimateDiff extension plugin at the bottom of txt2img.
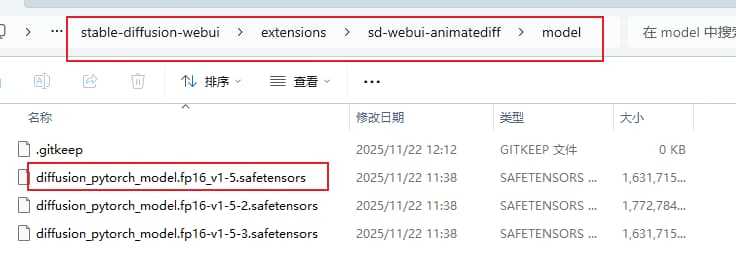
Download the model
Download the AnimateDiff animated model
For example, diffusion_pytorch_model.fp16_v1-5
Place it in the folder stable-diffusion-webui\extensions\sd-webui-animatediff\model
Remember to restart Stable Diffusion webui
Then you can see the AnimateDiff model options in the interface.
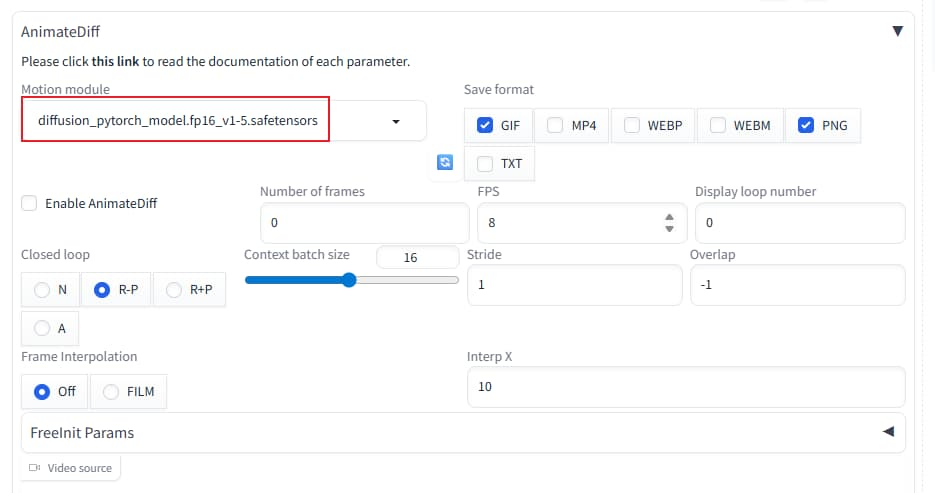
Using AnimateDiff
For example, txt2img
Check “Enable AnimateDiff”
Save format as gif, webp, or mp4 (gif allows for preview).
Set the number of frames to 16 for a quick demo, meaning 1 second (8 frames) per second (FPS), so 16 is 2 seconds.
Keep everything else at its default settings.
Because my AI animation isn’t very good, I’m too lazy to go into other details; just generate it directly.
